The Dragonfly necklace is complete
Posted by Sharon Gunn McMahon under bead charms, Peyote stitch | Permalink | Edit Post | Leave A Comment | No Comments
At the Concert in the park last weekend there were a couple of dragonflies that kept flying over the crowd. I had to wonder if they were frustrated or just puzzled at the huge influx of people filling up their evening fly zone.
This necklace is peyote stitch in an asymmetrical design so that the dragonfly looks like he is swerving around your neck as you wear him. Fun!
Tuesday, July 5, 2011
Sunday, July 3, 2011
How to Draw Whimsical Birds
Drawing is known as a ready outlet for creativity and for helping people to relax. While there are a variety of subjects that individuals can draw, many people are attracted to birds. Birds may appeal to the human desire to soar above the difficulties of the day or to the wish to see the horizon or the future from a higher perspective. For some, however, whimsical birds are simply entertaining subjects to draw.
Method 1: Start With the Bird's Body
Step 1
Draw a sideways "S" shape on a sheet of paper. Make a line across the "S" shape from the beginning point to the end point.
Step 2
Make a circle in the upper section where you want the eye to be. Color the eye in with a pattern or a solid color. Add a v-shaped beak on the front of the head. In the lower section of the s-shape you drew, locate the area where you want the wing to be.
Step 3
Draw a wing using a straight horizontal line. Make a curved line under the horizontal line that connects at each end. Make twirling loops in the wing area to represent feathers.
Step 4
Add more embellishments as desired.
Method 2: Start With the Head
Step 1
Draw a small circle in the upper center area of your paper. Make it about the size of a pencil eraser. This is your bird's eye.
Step 2
Draw a larger circle around the small circle. Leave one side of the circle out and make a straight line there. Make the larger circle about the size of a golf ball. This is the bird's head.
Step 3
Draw a straight line out from the center of the line on the side of the circle. Put your marker or pencil at the end of that line. Make a curved line arching up to the top of the head straight line. Then make another curved line from the tip back to the bottom of the straight line on the side of the head. You now have a head with an eye and a beak. Mona Brookes, artist and author, explains: "When doing the outer edges of the beak, it is best to start at the point and work back to the head ..." Brookes recommends using u-shaped doodles to form feathers on the wings and tail.
Step 4
Draw your preferred embellishments on the beak and head. Decide how long you want the body to be. Make a horizontal line across the page there. This can be the branch your bird is sitting on. Draw three loops on each side of the horizontal line for the toes of each foot. Make a line going across the bottom of his toe areas for the bottom of the branch.
Step 5
Draw a line curving outward from the bottom of the head to the outer edge of the toes on one side and then the other. This is the body. Mark off the area on each side of the body for the wings. Long u-shaped loops can form the tail feathers seen below the feet and behind the branch you drew. Add more embellishments as desired.
Method 3: Simple Bird Shapes with Extreme Details
Step 1
Draw an oval but make it pointed at one end. This is a basic teardrop shape. Draw stick figure legs under it. Place an eye near the pointed end. Divide the point in half with a line from the point to an area where you think the beak should end. Draw a line across the point from side to side to end the beak.
Step 2
Divide the body of your bird into several different areas such as head, wing, body and tail.
Step 3
In each section, draw doodled patterns as the mood inspires you. There are no rules and no limits to this kind of drawing. A Zentangle resource has been included for pictorial inspiration.
Skill
• Easy
Things You'll Need
• Paper
• Pen
References
• YouTube: Whimsical Bird Sketch [http://www.youtube.com/watch?v=s7eWq1E3mTs]
• "Drawing With Children: A Creative Teaching and Learning Method That Works for Adults, Too"; Mona Brookes; 1986
Resource
• Showing Content from the Zentangle Pool [http://www.flickr.com/search/groups/?w=35241465%40N00&m=pool&q=birds]
Drawing is known as a ready outlet for creativity and for helping people to relax. While there are a variety of subjects that individuals can draw, many people are attracted to birds. Birds may appeal to the human desire to soar above the difficulties of the day or to the wish to see the horizon or the future from a higher perspective. For some, however, whimsical birds are simply entertaining subjects to draw.
Method 1: Start With the Bird's Body
Step 1
Draw a sideways "S" shape on a sheet of paper. Make a line across the "S" shape from the beginning point to the end point.
Step 2
Make a circle in the upper section where you want the eye to be. Color the eye in with a pattern or a solid color. Add a v-shaped beak on the front of the head. In the lower section of the s-shape you drew, locate the area where you want the wing to be.
Step 3
Draw a wing using a straight horizontal line. Make a curved line under the horizontal line that connects at each end. Make twirling loops in the wing area to represent feathers.
Step 4
Add more embellishments as desired.
Method 2: Start With the Head
Step 1
Draw a small circle in the upper center area of your paper. Make it about the size of a pencil eraser. This is your bird's eye.
Step 2
Draw a larger circle around the small circle. Leave one side of the circle out and make a straight line there. Make the larger circle about the size of a golf ball. This is the bird's head.
Step 3
Draw a straight line out from the center of the line on the side of the circle. Put your marker or pencil at the end of that line. Make a curved line arching up to the top of the head straight line. Then make another curved line from the tip back to the bottom of the straight line on the side of the head. You now have a head with an eye and a beak. Mona Brookes, artist and author, explains: "When doing the outer edges of the beak, it is best to start at the point and work back to the head ..." Brookes recommends using u-shaped doodles to form feathers on the wings and tail.
Step 4
Draw your preferred embellishments on the beak and head. Decide how long you want the body to be. Make a horizontal line across the page there. This can be the branch your bird is sitting on. Draw three loops on each side of the horizontal line for the toes of each foot. Make a line going across the bottom of his toe areas for the bottom of the branch.
Step 5
Draw a line curving outward from the bottom of the head to the outer edge of the toes on one side and then the other. This is the body. Mark off the area on each side of the body for the wings. Long u-shaped loops can form the tail feathers seen below the feet and behind the branch you drew. Add more embellishments as desired.
Method 3: Simple Bird Shapes with Extreme Details
Step 1
Draw an oval but make it pointed at one end. This is a basic teardrop shape. Draw stick figure legs under it. Place an eye near the pointed end. Divide the point in half with a line from the point to an area where you think the beak should end. Draw a line across the point from side to side to end the beak.
Step 2
Divide the body of your bird into several different areas such as head, wing, body and tail.
Step 3
In each section, draw doodled patterns as the mood inspires you. There are no rules and no limits to this kind of drawing. A Zentangle resource has been included for pictorial inspiration.
Skill
• Easy
Things You'll Need
• Paper
• Pen
References
• YouTube: Whimsical Bird Sketch [http://www.youtube.com/watch?v=s7eWq1E3mTs]
• "Drawing With Children: A Creative Teaching and Learning Method That Works for Adults, Too"; Mona Brookes; 1986
Resource
• Showing Content from the Zentangle Pool [http://www.flickr.com/search/groups/?w=35241465%40N00&m=pool&q=birds]
Wednesday, June 8, 2011
Growth
Amazing how in a very short time this little guy has more than doubled in size! Sometimes I feel like I need to grow that fast. I just wish I knew how to expedite it! All he has to do is keep eating... somehow that doesn't work for me.
Tuesday, June 7, 2011
Garden Beauty
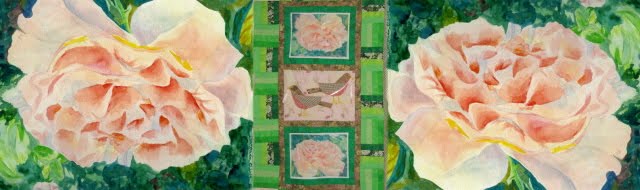
I love how things grow - and change. And I love how beautiful things are. These things are so artistically made by one Creator who really knows how it is done!
Friday, March 25, 2011
Sixteen Patch Quilt Blocks
The sixteen patch quilt blocks can be simplified by using a rotary cutter with a cutting mat and straight edge. Once you determine the size of the squares in your block, add 1/2 inch to each dimension. If you want four inch squares, you will cut your squares at 4 1/2 inches. You only need two colors or shades of fabric to make the sixteen patch blocks. Sashing may be added in an additional color or colors after you put the block(s) together.
The number of blocks you will need is determined by the size quilt you are making. For a sixteen patch quilt block to be used as a wall hanging you will need a quarter yard of each of your two fabric choices. This will make one block that is 16 inches by 16 inches square.
First: Cut your fabric into four and a half inch wide strips.
Second: Sew the strips together, alternating the two fabrics. For example, if you are making the blocks with a white fabric and a blue fabric, sew a 4-strip sets alternating white and blue. Press seams open.
Third: Place the 4-strip set on the cutting mat and cut it, running across the strips, to make four and a half inch wide strips that have alternating colors.
Fourth: Pin cut strips together in alternating colorways. Match white squares to blue squares, for example, and pin or baste seams together. Match edges.
Fifth: Stitch along basted or pinned edges, removing pins as they approach presser foot. Press seams open. Turn block over and press flat using ironing cloth.
Add sashing as desired and press. Quilt block is ready to be embellished with embroidery, beads, etc. or to be layered with batting and backing to make the classic "quilt sandwich" and secured with quilting. Embellish as desired.
If you are making a larger quilt, you will need approximately 1/4 yard per block. The finished blocks will be 16 by 16 inches. You will need to calculate how many blocks will be needed. Sashing is the strip of fabric between the squares. It may be the same fabric used in the block, or it may be a coordinating fabric. Decide how wide you want the sashing to be, then cut strips in that width by 16-1/2 inches. Stitch the sashing to each side of a block, then add a block to the far edge of a sashing strip. Continue until you have the width you need, adding a strip of sashing on the outside edge of the last block. Press seams.
Once you have assembled your sixteen patch blocks into strips the appropriate width, cut sashing strips to a length to fit the width of the quilt. Stitch a strip of this sashing to the top and the bottom of your quilt block strip. Press seams. Add another row of quilt blocks. Continue adding rows of quilt blocks until the quilt top is the desired length. Add sashing to the outside of the top and bottom row. Press seams. Check that quilt top lies flat.
Add sashing along the sides of the quilt top. Assemble the quilt sandwich. Baste quilt sandwich or place in non-baste frame and you are ready to quilt.
The number of blocks you will need is determined by the size quilt you are making. For a sixteen patch quilt block to be used as a wall hanging you will need a quarter yard of each of your two fabric choices. This will make one block that is 16 inches by 16 inches square.
First: Cut your fabric into four and a half inch wide strips.
Second: Sew the strips together, alternating the two fabrics. For example, if you are making the blocks with a white fabric and a blue fabric, sew a 4-strip sets alternating white and blue. Press seams open.
Third: Place the 4-strip set on the cutting mat and cut it, running across the strips, to make four and a half inch wide strips that have alternating colors.
Fourth: Pin cut strips together in alternating colorways. Match white squares to blue squares, for example, and pin or baste seams together. Match edges.
Fifth: Stitch along basted or pinned edges, removing pins as they approach presser foot. Press seams open. Turn block over and press flat using ironing cloth.
Add sashing as desired and press. Quilt block is ready to be embellished with embroidery, beads, etc. or to be layered with batting and backing to make the classic "quilt sandwich" and secured with quilting. Embellish as desired.
If you are making a larger quilt, you will need approximately 1/4 yard per block. The finished blocks will be 16 by 16 inches. You will need to calculate how many blocks will be needed. Sashing is the strip of fabric between the squares. It may be the same fabric used in the block, or it may be a coordinating fabric. Decide how wide you want the sashing to be, then cut strips in that width by 16-1/2 inches. Stitch the sashing to each side of a block, then add a block to the far edge of a sashing strip. Continue until you have the width you need, adding a strip of sashing on the outside edge of the last block. Press seams.
Once you have assembled your sixteen patch blocks into strips the appropriate width, cut sashing strips to a length to fit the width of the quilt. Stitch a strip of this sashing to the top and the bottom of your quilt block strip. Press seams. Add another row of quilt blocks. Continue adding rows of quilt blocks until the quilt top is the desired length. Add sashing to the outside of the top and bottom row. Press seams. Check that quilt top lies flat.
Add sashing along the sides of the quilt top. Assemble the quilt sandwich. Baste quilt sandwich or place in non-baste frame and you are ready to quilt.
Thursday, February 17, 2011
creativity
there are times when life compresses upon us
creativity flattens
the entire view of life becomes skewed
going through the motions of living
energy is fully expended in dealing with the current life emergency.
finally a sense of direction
knowing where to be
beginning to function again
lostness begins to resolve
the feeling of loss and brokenness will fade
creativity senses new hope
awakening as if from a long winter nap
it begins to move around, to seek inspiration
creativity will spring back to life
eagerly as it once did
creativity flattens
the entire view of life becomes skewed
going through the motions of living
energy is fully expended in dealing with the current life emergency.
finally a sense of direction
knowing where to be
beginning to function again
lostness begins to resolve
the feeling of loss and brokenness will fade
creativity senses new hope
awakening as if from a long winter nap
it begins to move around, to seek inspiration
creativity will spring back to life
eagerly as it once did
Tuesday, September 7, 2010
Book Fairy Project Final
So - after much soul searching and locale-exploring I was at the library. They had a lovely art show going on in the gallery. I enjoyed the art and then was struck by a sudden urge - a feeling that this was the place to leave the 88th book from the 100 Books Project.
I set the book on a bench, took a couple of pictures, and left hoping and praying that the "right Person" would be along shortly. Hopefully we will hear something soon!
Subscribe to:
Posts (Atom)
